
DIY Milling Spindle
This project was an attempt to find an inexpensive alternative to the Rotozip SCS01 spiral saw I had used previously with the Rabbot. The Rotozip was cheap and powerful, but at 30,000 RPM with no speed regulation it was unsuitable for most metal cutting applications. It also had visible runout. I considered the DeWalt DNP611, the cheaper business end of their DWP611 palm router. This router sells for $80-120USD and features adjustable speed. Unfortunately reports suggest that the speed is unregulated and can vary considerably under load. DeWalt and most other palm router manufacturers don't offer an 1/8" collet, critical for the micromachining I intended to do. Aftermarket collets and adapters are available, but these drive up the cost and increase runout. Then I considered chinese CNC spindles from eBay. The cheap 300W and smaller spindles are just a collet adapter set-screw mounted to a DC motor, unconvincing for metalwork tougher than light engraving. The 800W and higher spindles run $200USD+ and require a variable frequency drive (VFD) which runs another $150-300USD. Reviews are mixed: some people (the majority?) report great success; some report success after bearing replacement; and some just wind up with lemons. Since shipping a defective spindle back to China is a large proportion of the purchase price, the purchase is essentially a gamble. There are domestic distributors which work with manufacturers in China to do proper quality control, resulting in a more reliable and warrantied product, but this service doubles the cost. Several people have experimented with replacing the shaft of a brushless DC (BLDC) hobby motor with an ER collet extension tool, an intriguing low-cost option:
- High Speed Milling Spindle
- Brushless DC Motor - CNC High Speed Spindle
- MYCNCUK: Diy brushless spindle
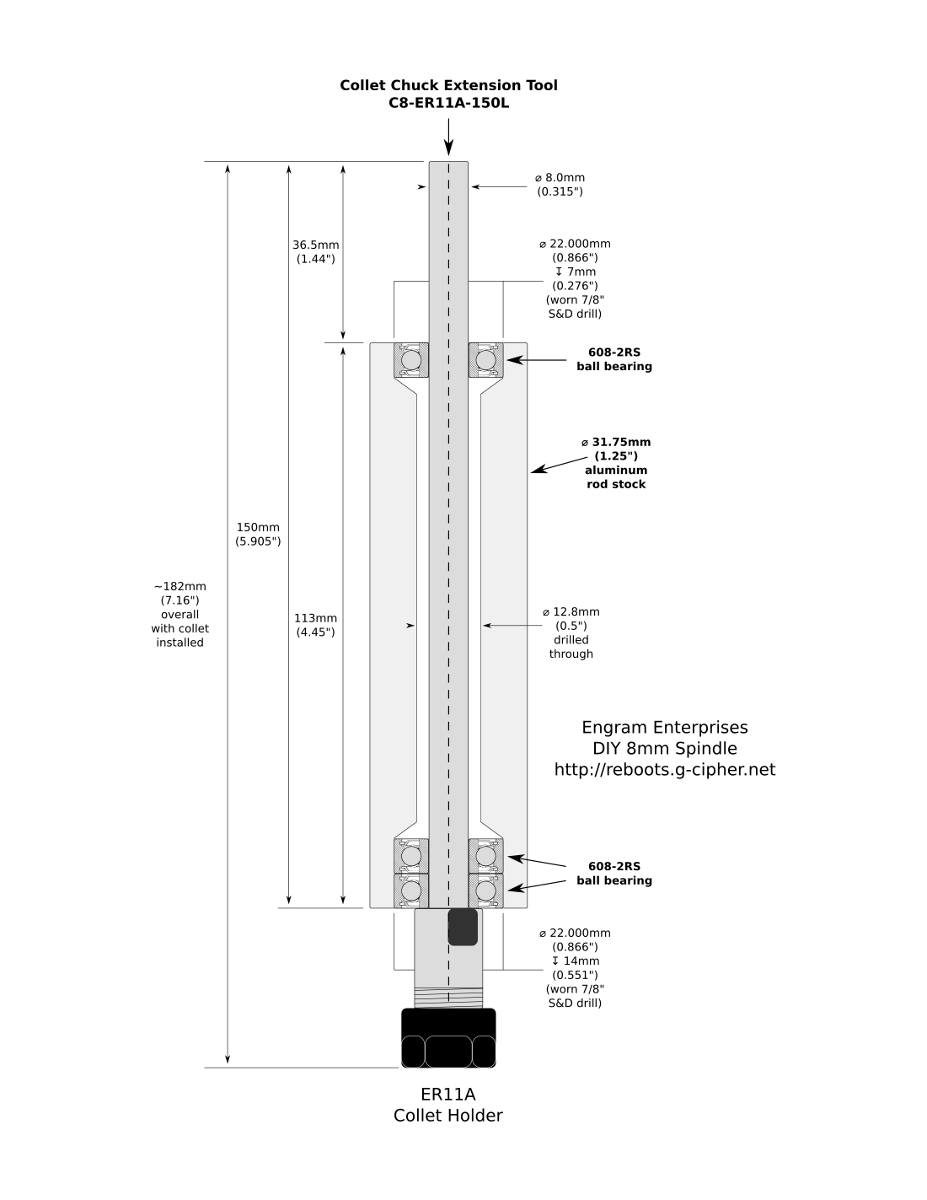
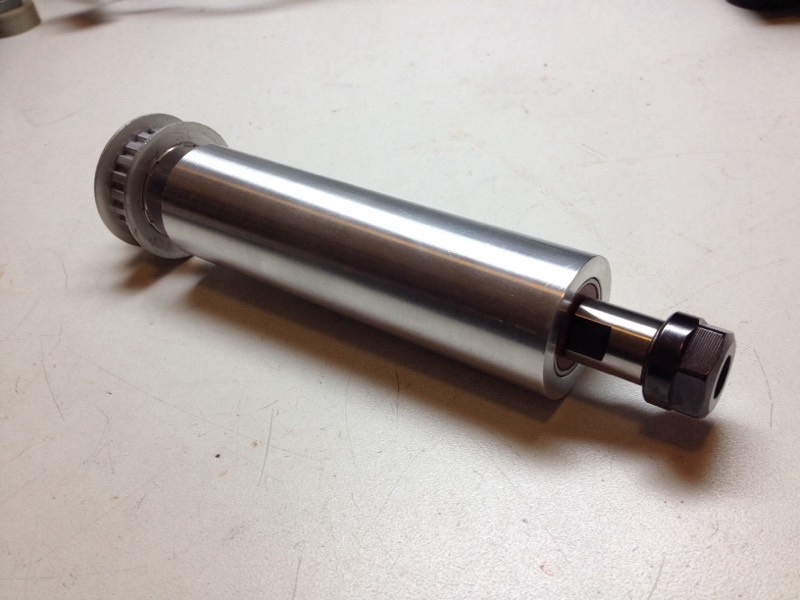
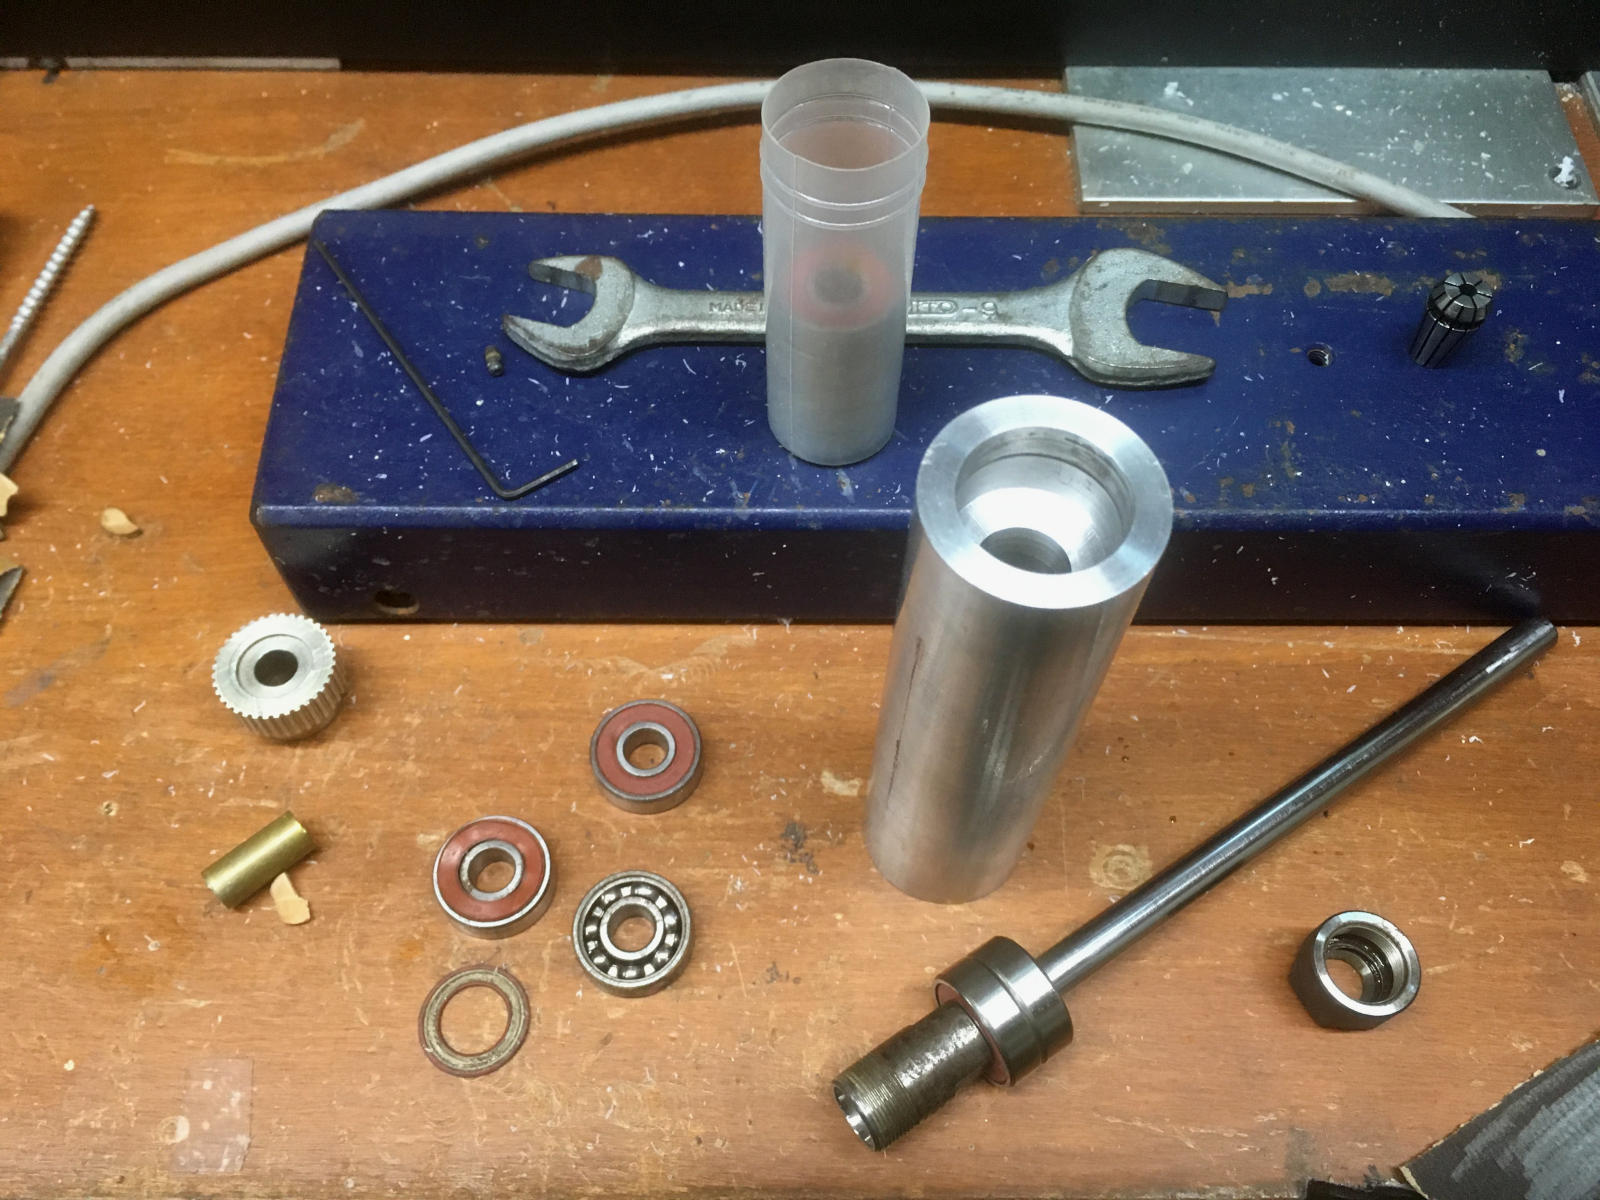
I used a friend's 1946 South Bend lathe to machine a length of 1.25" aluminum round stock. The lathe's 3-jaw chuck had poor concentricity; I compensated by flipping the stock axially without rotating it radially when it was time to operate on the opposite end. The bearing bore wasn't concentric with the housing, but end-to-end alignment of the bearings was very good. Machining steps were as follows:
- Chuck the rod stock, drill through to 0.5".I probably started a pilot hole with a long drill and used successively larger drills to reach the final diameter. Diameter and finish are non-critical, the bore just needs to clear the extension tool shaft.
- Make a bore at each end for the bearings. Using successively larger Silver & Deming drills, work up to near 22 MM diameter; then bore to final size. My design used two bearings at the collet end of the spindle (14 MM depth), one bearing at the top (7 MM depth).I had a 7/8" S&D drill on hand in fairly bad shape that actually measured under 22 MM across the flutes. After drilling to depth I found the holes were a snug press fit for the bearings, no boring needed. Ordinarily a 7/8" drill would approximate 22.225 MM, and runout of the lathe would increase the diameter even more. I was satisfied with the good luck; your mileage may vary.
- Optional: polish the housing with a scrub pad for appearance.
| 8mmspindlediagram.pdf | 8mm spindle diagram in PDF format |
| 8mmspindlediagram.svg | 8mm spindle diagram in SVG format |
 BLDC Motor Mount
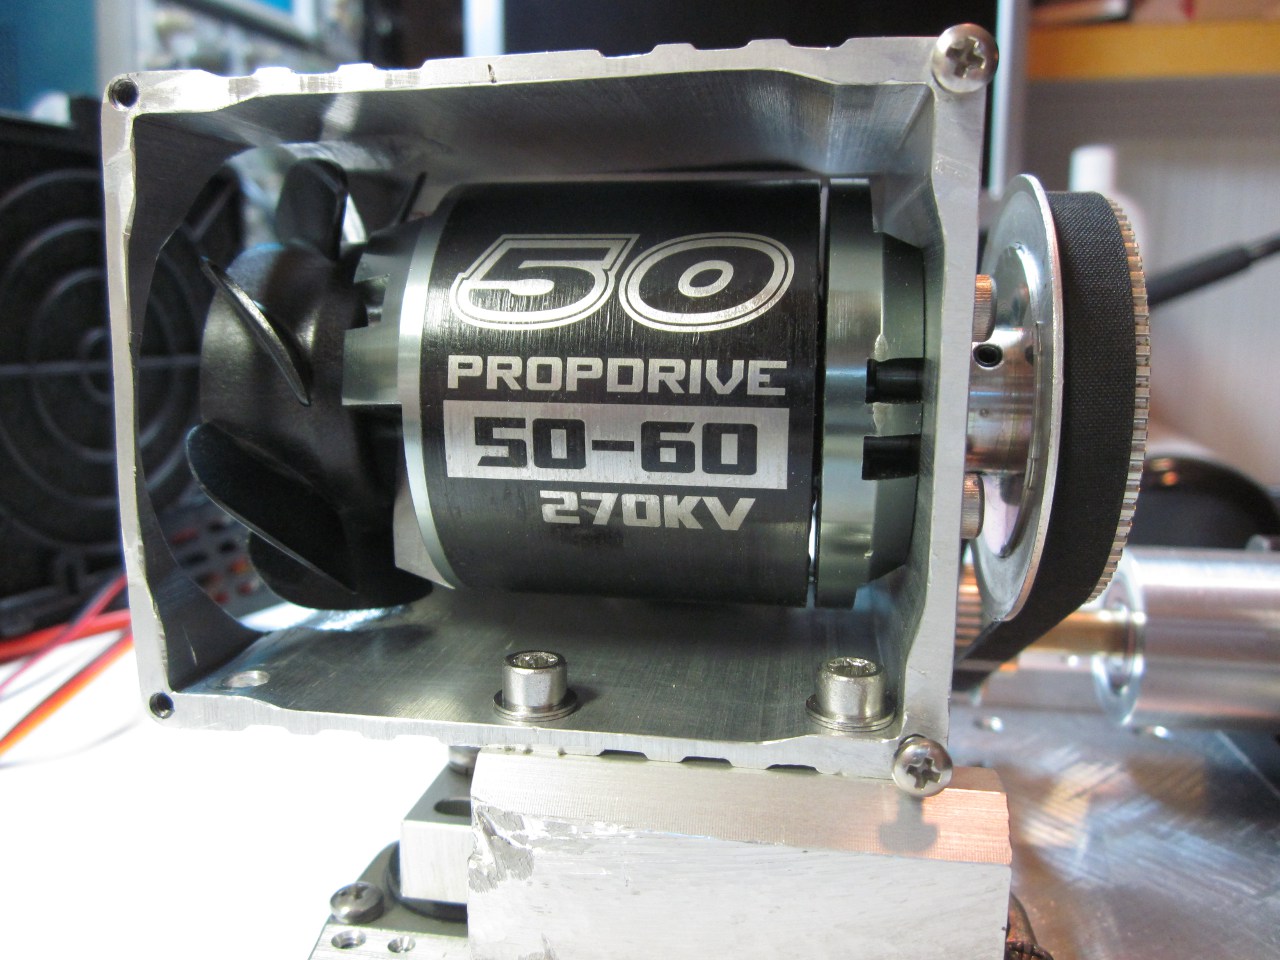
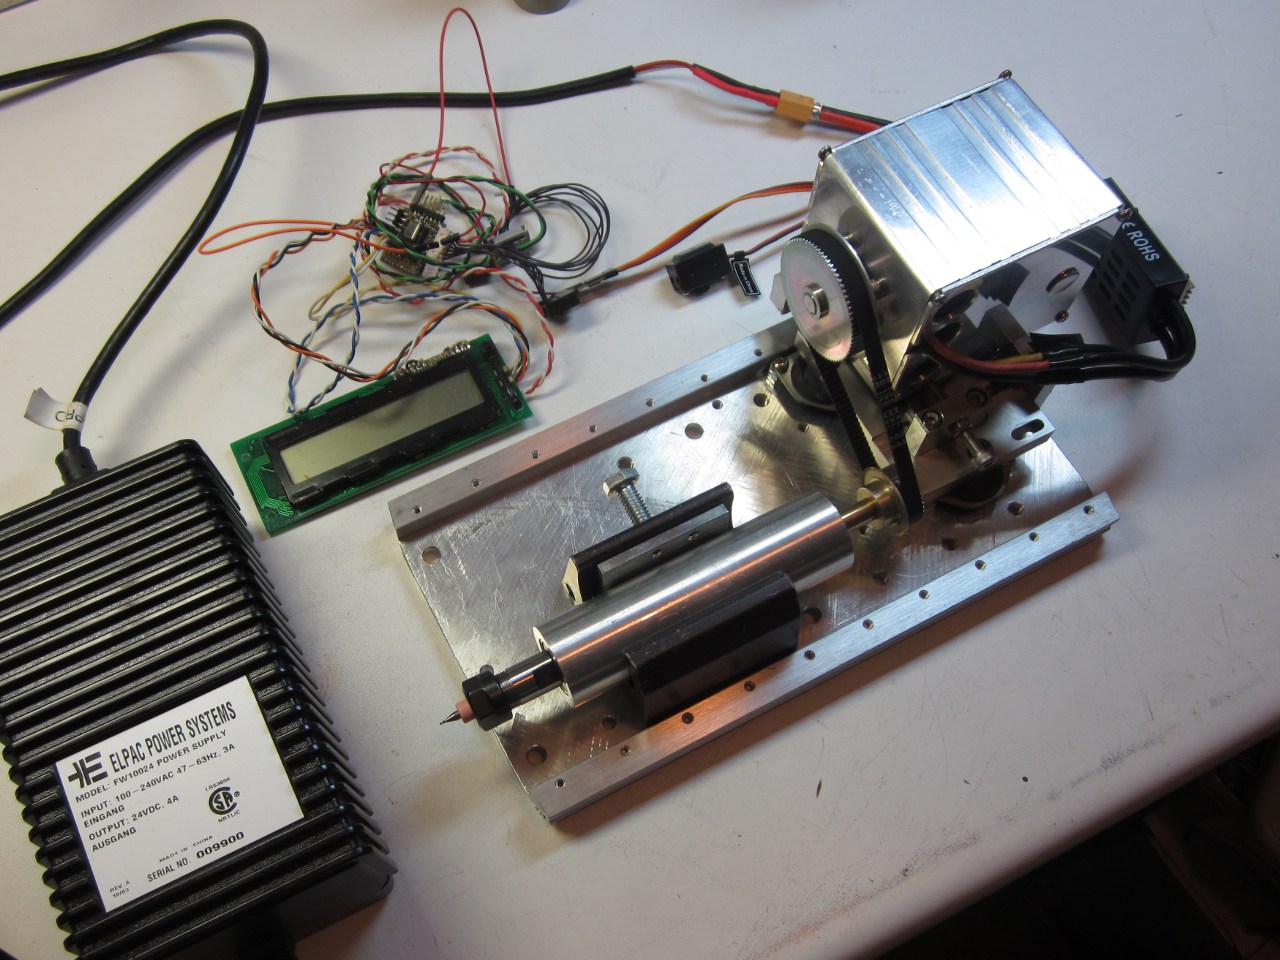
For spindle power I expected to use a blender motor, a DC servo with a broken encoder, or really just about anything else on hand. Local hero Steve Ward was kind enough to loan me a fairly serious BLDC motor (NTM Prop Drive 50-60 270KV / 2400W from HobbyKing.com, now apparently discontinued) and a Turnigy Brushless ESC 85A w/ 5A SBEC. (50-60 refers to diameter, 50 MM, and length, 60 MM.) To control the ESC I used Mikael's Servo Tester 1 code in an AVR breakout board I had on hand. For initial testing I used a 24VDC 4A power supply. Cautionary note: BLDC motors are tremendously powerful relative to their small size. Outrunner BLDCs in particular should be thought of as an inverted kitchen blender on a stick. While testing this motor fixed in a Panavise, I received a serious injury which required expensive stitches. Don't let it happen to you! Build a solid mount and preferably a shroud before experimenting with these motors. As a starting point for the assembly I used a 0.25" aluminum plate, with reinforcing ribs on the sides. I built an enclosure for the motor from a chunk of aluminum box channel which happened to have the perfect dimensions to mount the face of the motor, clear the rotor, and accomodate a high-flow cooling fan from a server chassis. The fan was removed from its original motor and mounted to the top of the BLDC, exhausting upward through a cutout made with a hole saw. Although this made for an elegant assembly, there's ultimately not a lot of flow around the motor. Most heat dissipation seems to be through the motor mount and aluminum housing. Fortunately the motor doesn't get very hot in operation, but a separate electric fan with high flow irrespective of motor RPM might be a better solution for prolonged heavy load conditions.
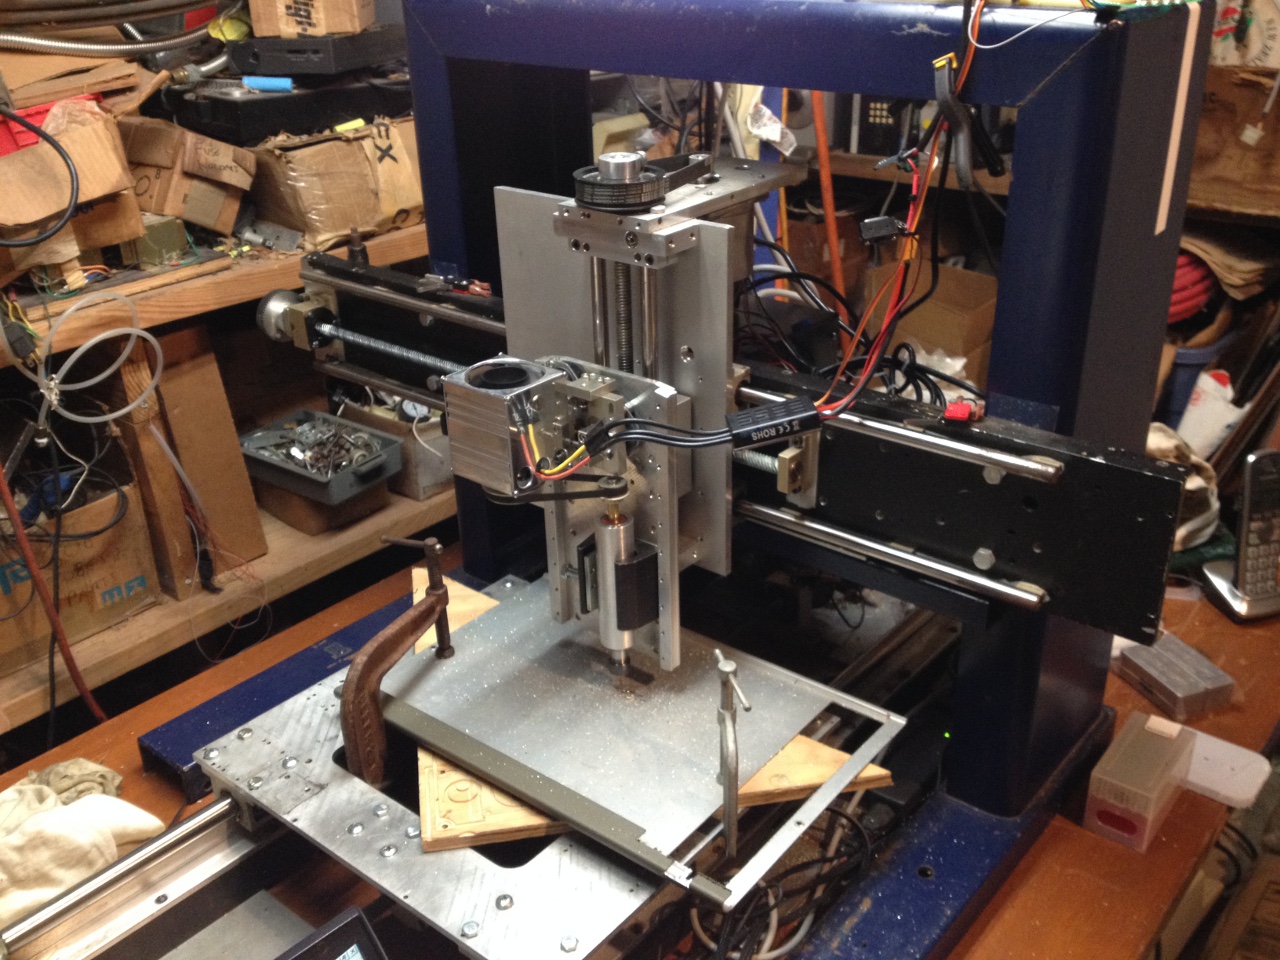
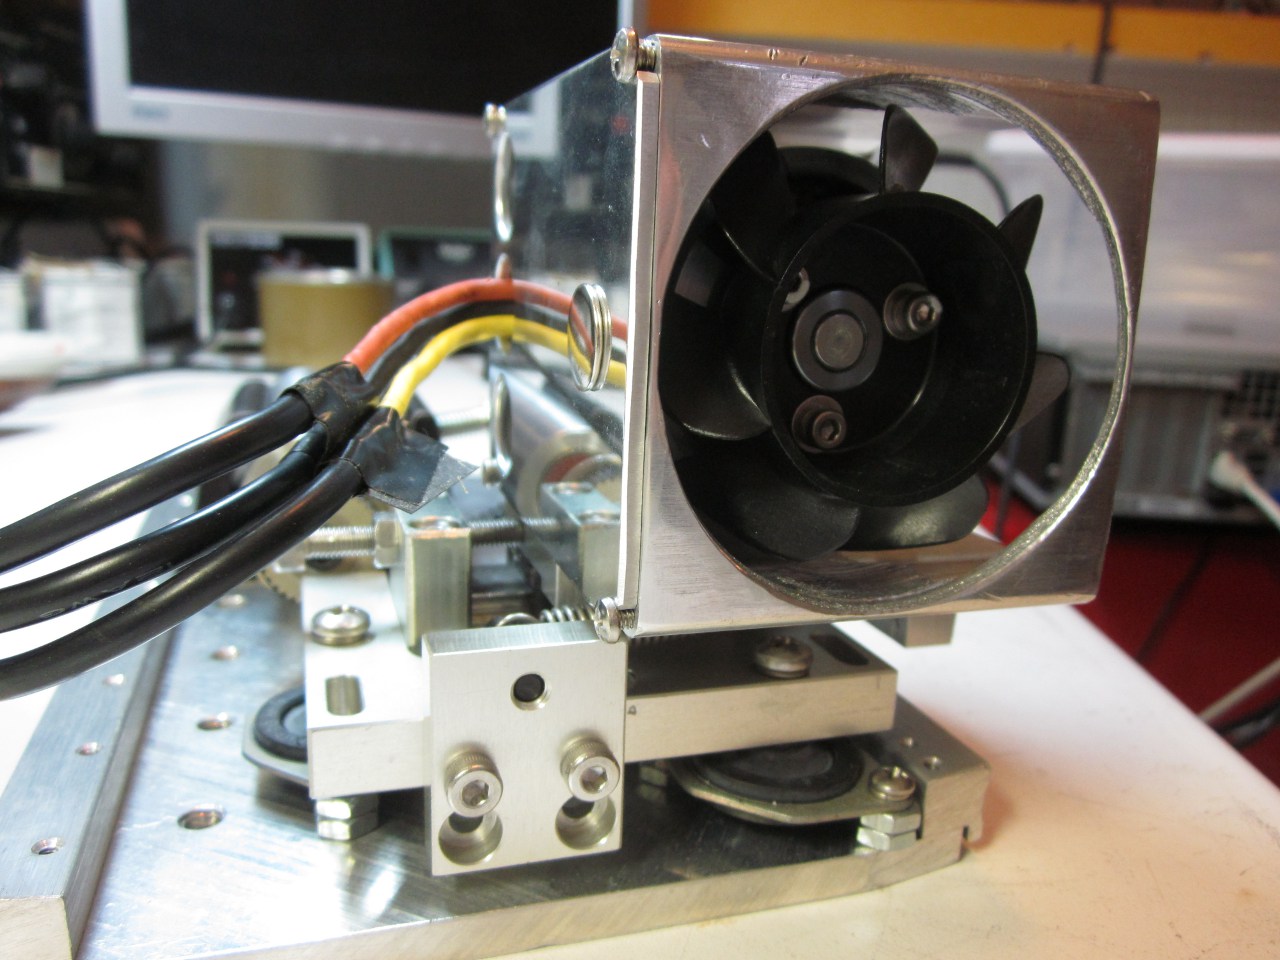 The motor housing was mounted on a small linear slide assembly from some
ancient surplus industrial equipment, attached to shock mounts from an 8"
HDD. The slide assembly only has about 0.325" of travel and incorporates
a spring, perfect for keeping tension on the power transmission belt. The
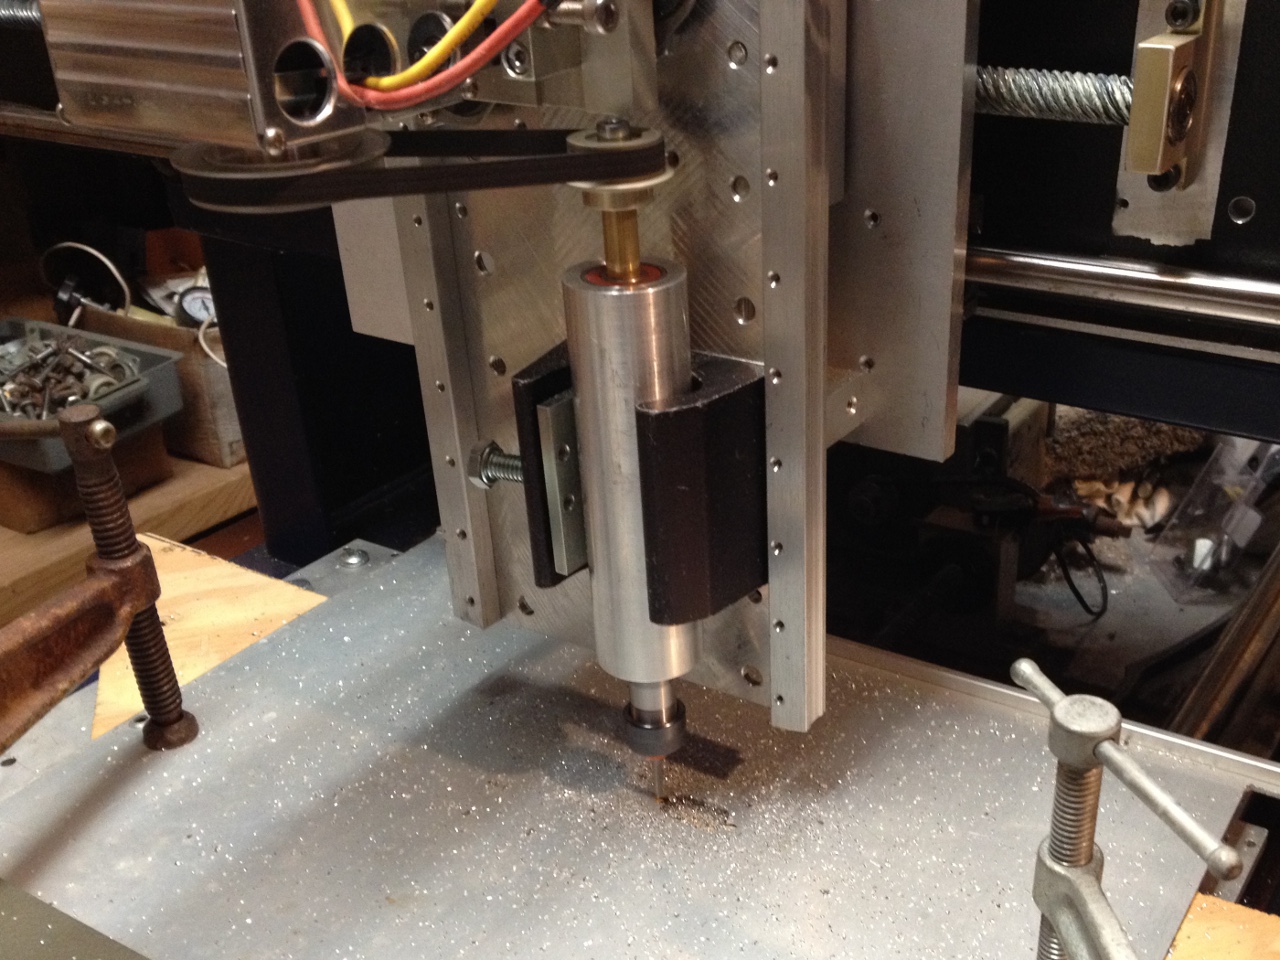
spindle itself was mounted in an aluminum clamp of unknown provenance,
possibly from a desk lighting fixture.
The motor housing was mounted on a small linear slide assembly from some
ancient surplus industrial equipment, attached to shock mounts from an 8"
HDD. The slide assembly only has about 0.325" of travel and incorporates
a spring, perfect for keeping tension on the power transmission belt. The
spindle itself was mounted in an aluminum clamp of unknown provenance,
possibly from a desk lighting fixture.


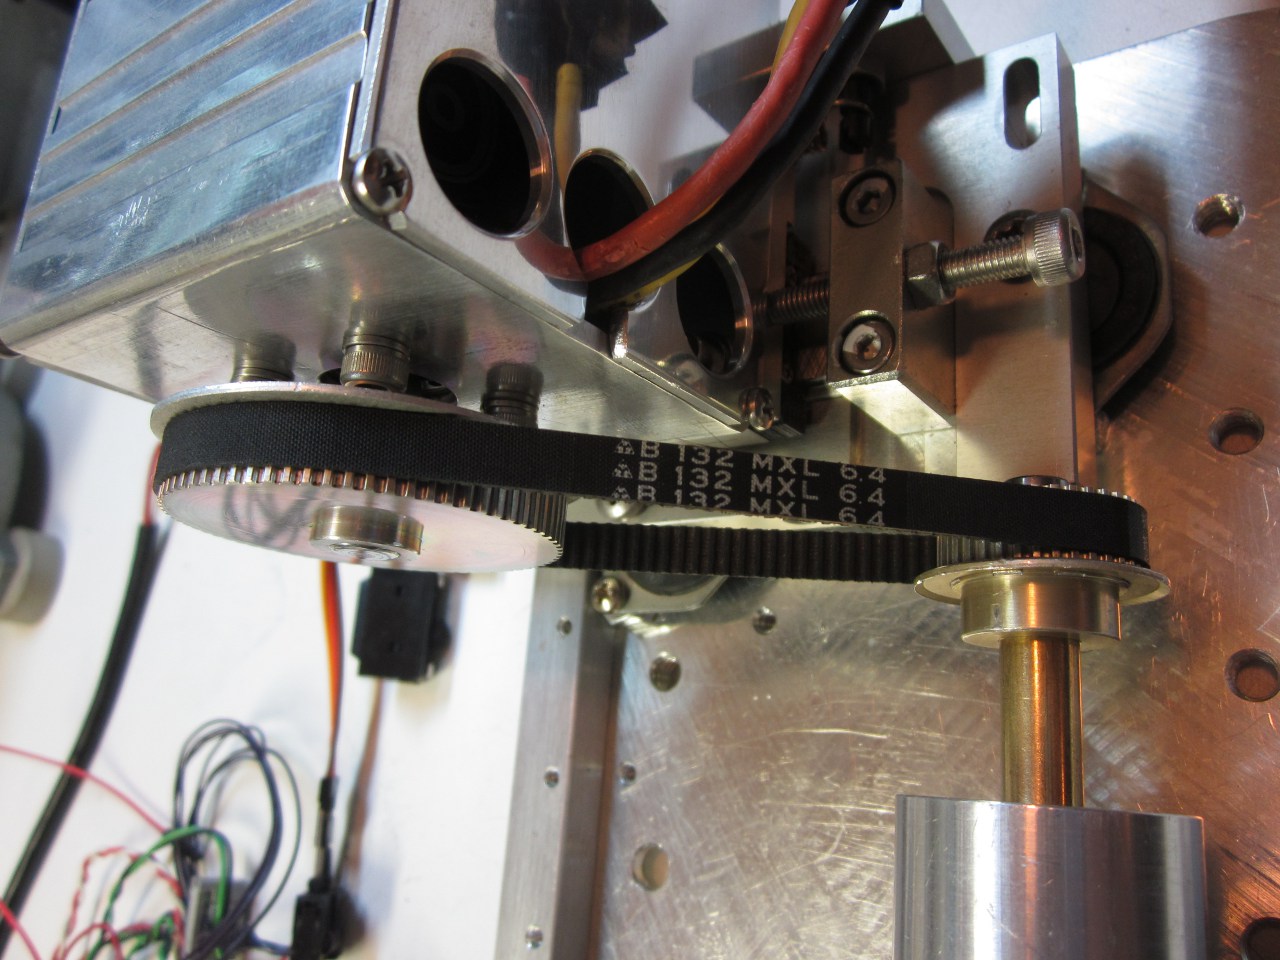
 Two aluminum MXL pitch pulleys salvaged from dead DC servos were drilled to
8 MM I.D. and installed for a 2:1 drive ratio. The motor has a 270 "KV"
rating; KV in this context is used to mean RPM per volt. The maximum voltage
rating for this motor is about 34V, which would yield 9180 RPM. At 24V,
maximum motor speed is 6600 RPM. The pulley ratio doubles this to 13200 RPM
at the spindle.
Two aluminum MXL pitch pulleys salvaged from dead DC servos were drilled to
8 MM I.D. and installed for a 2:1 drive ratio. The motor has a 270 "KV"
rating; KV in this context is used to mean RPM per volt. The maximum voltage
rating for this motor is about 34V, which would yield 9180 RPM. At 24V,
maximum motor speed is 6600 RPM. The pulley ratio doubles this to 13200 RPM
at the spindle.
 In testing, the spindle performed well for light cuts. The spindle housing was
barely warm to the touch after prolonged operation. However, the motor would
bog down on heavier cuts in aluminum. The motor claims a current rating of
70A; it seemed likely that the 4A power supply wasn't up to the task. I
installed two 12V @ 25A switching power supplies with isolated outputs
connected in series, and realized greatly improved performance.
The 270KV motor rating does not strike me as ideal for this application;
given sufficient current, a motor with a higher KV rating could easily
develop good cutting power at higher RPMs more suitable for engraving and
aggressive feed rates, without requiring a higher voltage power supply.
Turnigy's
Aerodrive SK3 series looks promising.
In testing, the spindle performed well for light cuts. The spindle housing was
barely warm to the touch after prolonged operation. However, the motor would
bog down on heavier cuts in aluminum. The motor claims a current rating of
70A; it seemed likely that the 4A power supply wasn't up to the task. I
installed two 12V @ 25A switching power supplies with isolated outputs
connected in series, and realized greatly improved performance.
The 270KV motor rating does not strike me as ideal for this application;
given sufficient current, a motor with a higher KV rating could easily
develop good cutting power at higher RPMs more suitable for engraving and
aggressive feed rates, without requiring a higher voltage power supply.
Turnigy's
Aerodrive SK3 series looks promising.
 After many tens of hours of operation, the spindle hasn't evidenced any
degraded performance. There is still no visible play or runout, and the
spindle barely gets warm in operation. I've accidentally crashed the tool
hard enough to twist the collet off-axis, with no permanent damage as a
result; the assembly and constituent parts all seem fairly rugged.
Although I had everything but the extension tool and collet already on hand,
I think an identical spindle could be built from scratch for around $20USD
in parts and materials. A usable BLDC and ESC could come in under $100USD.
This has been a very encouraging and useful experiment; I'll post an
update if and when anything fails.
UPDATE: Spindle Bearing Failure and Rebuild
After many tens of hours of operation, the spindle hasn't evidenced any
degraded performance. There is still no visible play or runout, and the
spindle barely gets warm in operation. I've accidentally crashed the tool
hard enough to twist the collet off-axis, with no permanent damage as a
result; the assembly and constituent parts all seem fairly rugged.
Although I had everything but the extension tool and collet already on hand,
I think an identical spindle could be built from scratch for around $20USD
in parts and materials. A usable BLDC and ESC could come in under $100USD.
This has been a very encouraging and useful experiment; I'll post an
update if and when anything fails.
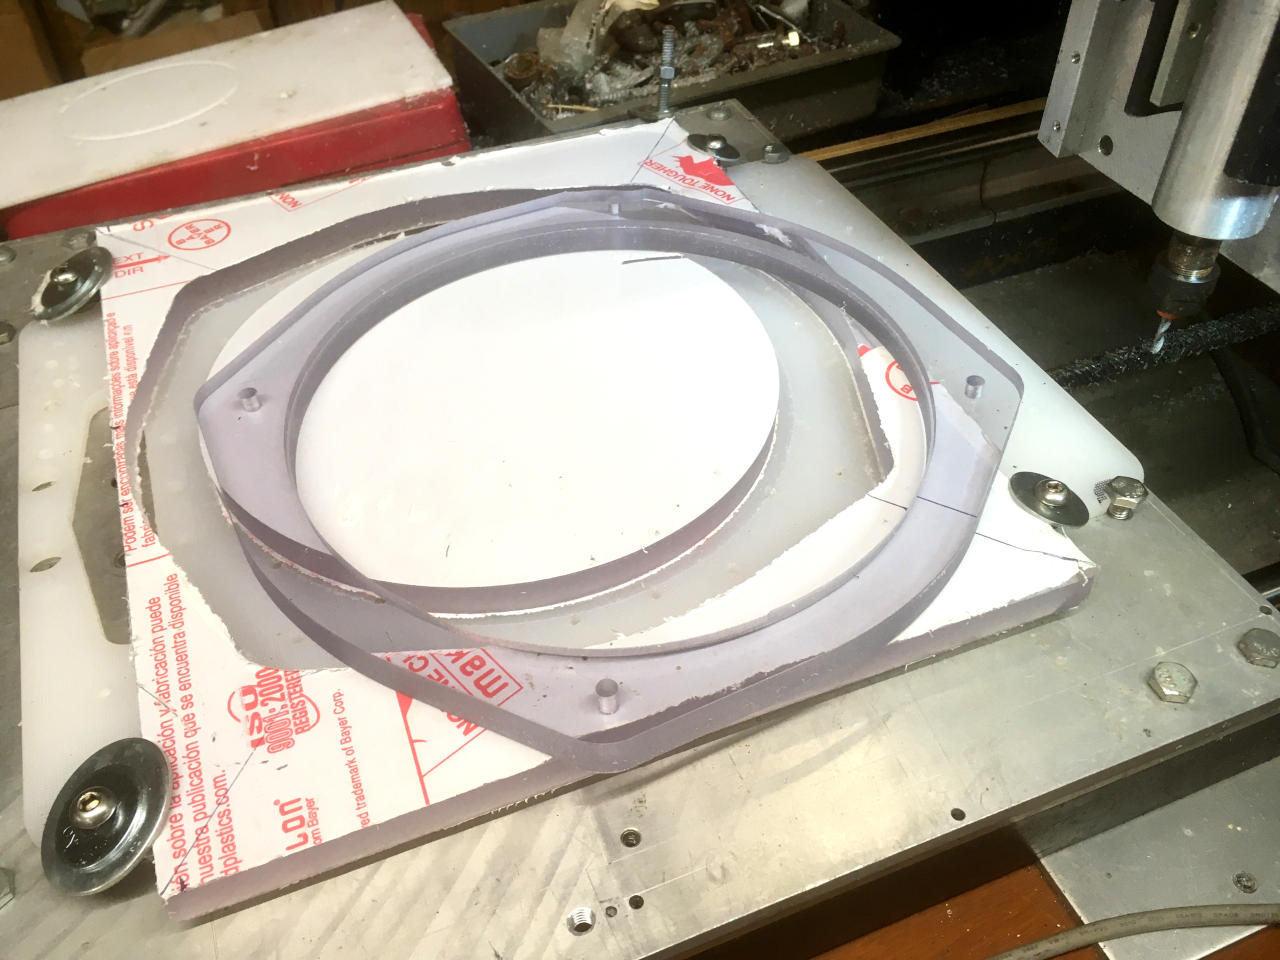
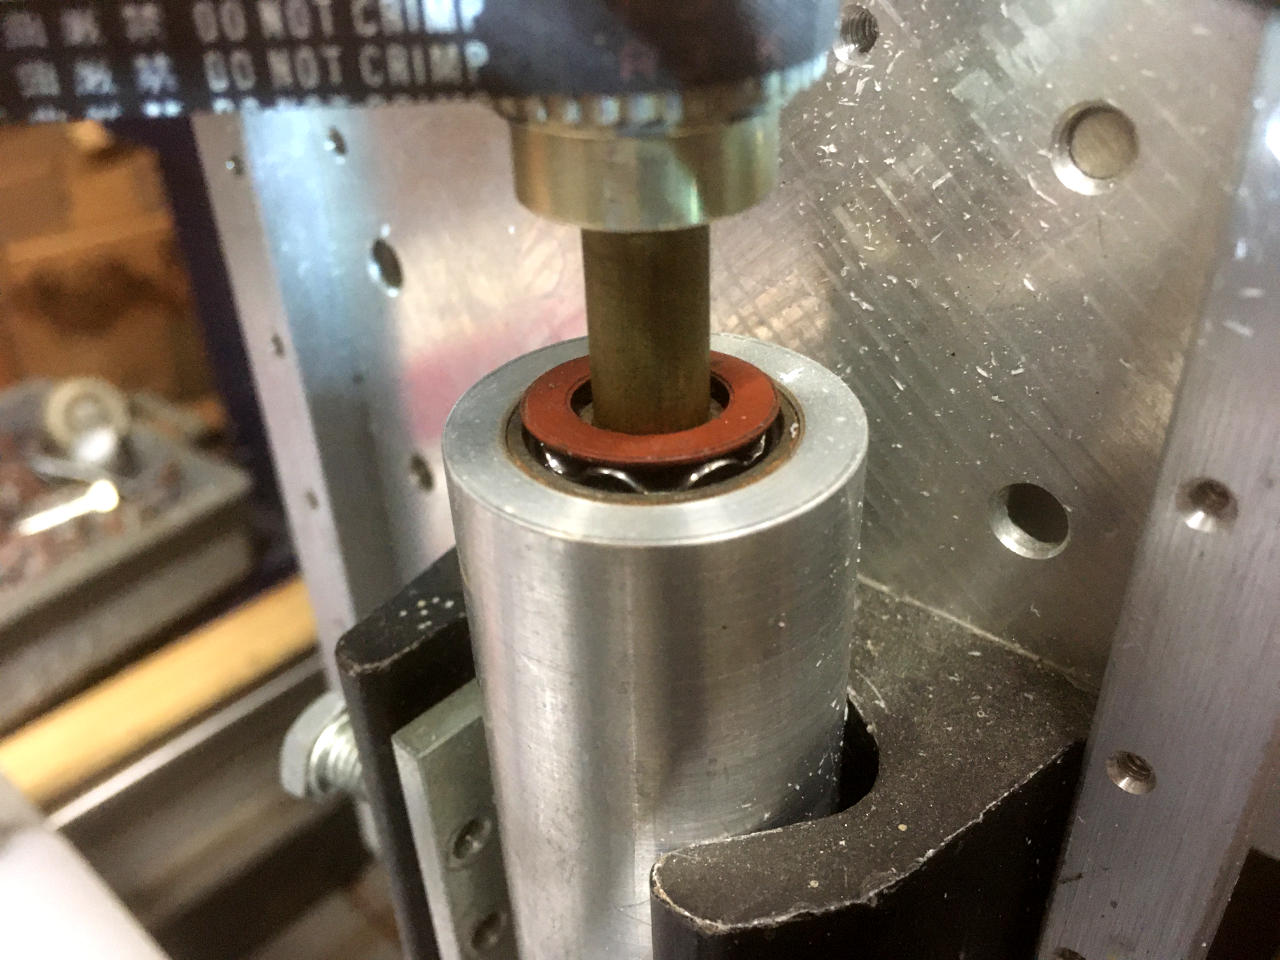
UPDATE: Spindle Bearing Failure and RebuildAfter approximately four years of periodic use, the tail bearing in the spindle failed at the end of an extended job in 1/2" polycarbonate. I had observed that the belt tension was loose, and tightened the belt. Shortly thereafter the bearing began to whine and then grind, and the balls bound in the races with sufficient violence to pop the dust seal free. I disassembled the spindle and replaced all three bearings. There was some light surface corrosion of the collet tool, which made it difficult to press the two nose bearings off of the shaft, but there was no other damage or degradation visible on the tool or housing. I installed new 608-2RS bearings, reassembled the spindle, and returned it to service.
 Contact: reboots at g-cipher.net
XHTML and CSS compliant
:wq